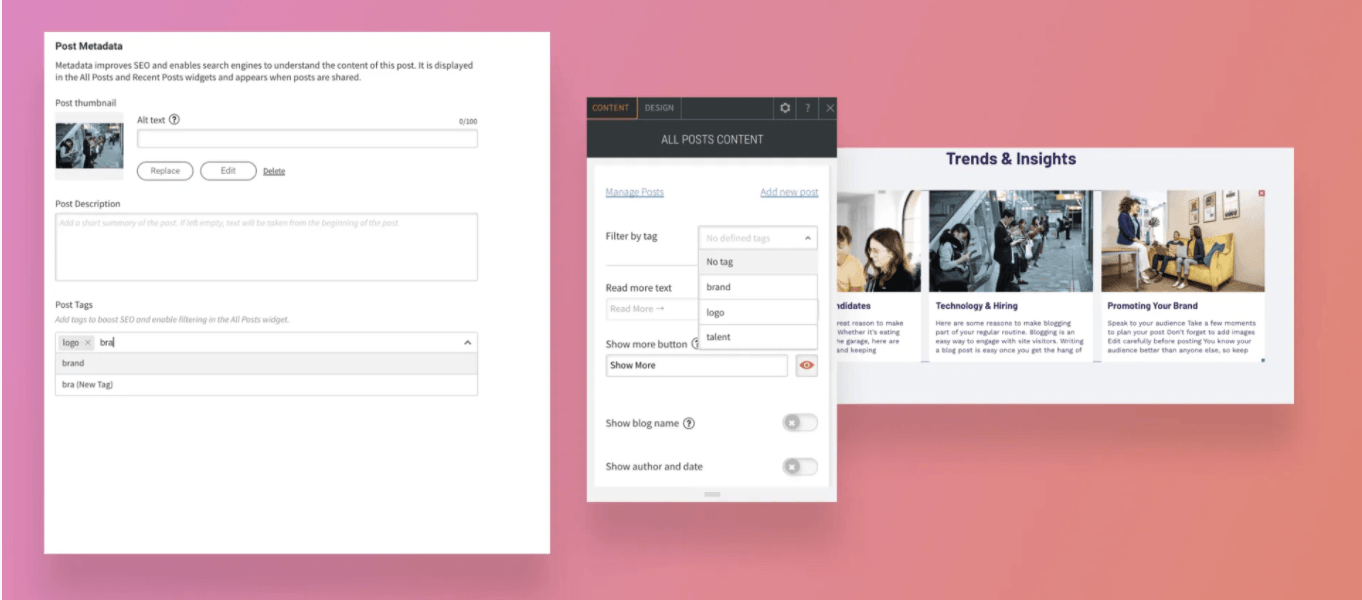
Adding tags to your blog posts is good for SEO and makes it easier for readers to find what they’re looking for. It’s now easier, too, with the tag autofill, which makes tagging posts quicker and ensures that the tags are consistent and error-free.
Once you’ve got tags in your posts, filter the posts in the All Posts widget, so all of the posts relating to that topic show up in the widget. This makes it easy to customise the blog posts you display to specific pages of your site and ensure that no posts are missed.
Tagging posts is important. Here's why!
Boosts site SEO
Adding tags to your post allows search engines to understand what your post is all about, so it can be found much easier. A few tips about tags:
- Use a few tags on each post.
- Use tags that are real words that people will use when they search online.
- Make sure the tags you use relate to multiple posts in the blog.
- Makes it easy to arrange site content
When you add blog posts to your site, you want them to be found. Adding tags to your posts enables them to be filtered so they can be sorted according to topic.
Let’s say you have a blog on a fitness site that includes articles about cycling, running and swimming. Tagging each post with the relevant sport means you’ll be able to filter them in the All Post widget and then display the posts on specific pages on the site. For example, posts with the tag “cycling” on the Cycling page, posts with the tag “running” on the Running page, etc.
Autofill makes everything easy and error-free
Autofill improves the tagging process by ensuring that tags are consistent, and saves you time by suggesting tags you’ve already used. Going back to the Fitness site example, autofill makes it easier to ensure that all running-related posts are tagged with the same word (“running”) and not variations of it.
HAVEN’T ADDED TAGS YET TO YOUR POSTS? NOW’S THE TIME
Adding tags to your posts is simple and quick. Just open the Blog panel, click Post Settings beside a post, and scroll down to the Tag field. Once you’ve typed in a tag or two in the post, scroll to the next post and repeat. Once your posts are tagged, you’ll be able to filter them according to those tags, which will appear automatically in the Filter by tag option at the top of the All Posts widget.